Obsidianを論文風のデザインに装飾するテンプレートを作ってみました。
コピペでご使用いただけます。
目次
Obsidianを論文風に装飾する
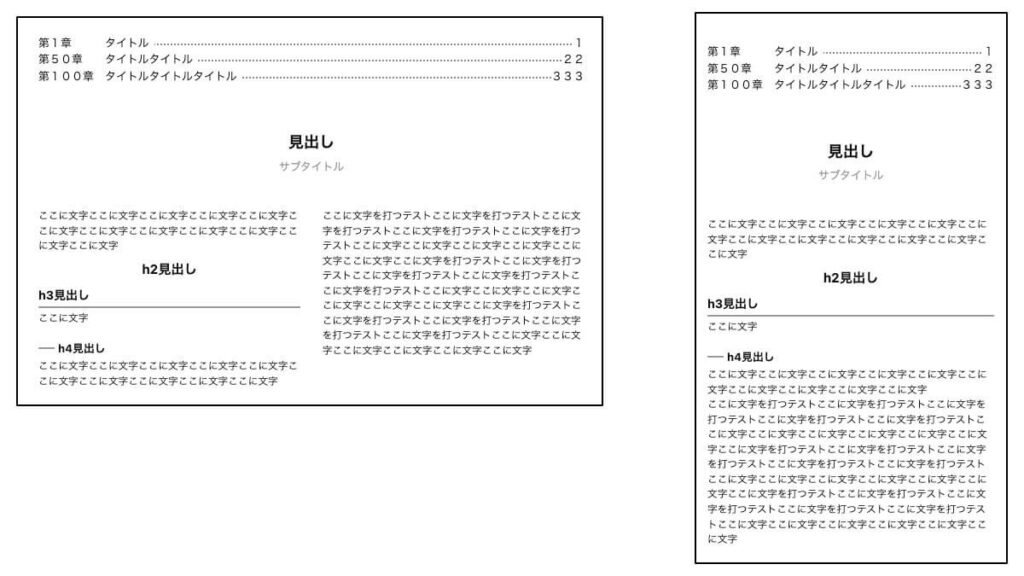
こちらが完成形です。
レスポンシブ対応済みです。
PC/SPでカラム数が変わります。
論文風の目次
第1章
タイトル
ページ番号
<div style="position: relative; display: flex; width: 100%; border: none;">
	<div style="width:6em; border: none; background-color: #fff; z-index: 2;">
		第1章
	</div>
	<div style="border: none; padding-right: 0.5em;background-color: #fff; z-index: 2;">
		タイトル
	</div>
	<div style="display: block; position: absolute; top: 50%; z-index: 1; width: 100%; border-bottom: dotted 2px #888;"></div>
	<div style="margin: 0 0 0 auto; background-color: #fff; z-index: 2;">
		ページ番号
	</div>
</div>
点線は自動挿入です。
ページ幅に合わせて、自動で点線の数を調整します。
論文風の2カラム
ここにテキストここにテキストここにテキストここにテキストここにテキストここにテキストここにテキストここにテキストここにテキストここにテキストここにテキストここにテキストここにテキストここにテキストここにテキストここにテキストここにテキストここにテキストここにテキスト
ここにテキストここにテキストここにテキストここにテキストここにテキストここにテキストここにテキストここにテキストここにテキストここにテキストここにテキストここにテキストここにテキストここにテキストここにテキストここにテキストここにテキストここにテキストここにテキスト
HTML
<div class="column2-waku">
	<div class="column2-left">
		<!--左側のカラム-->

		ここにテキストここにテキスト

		<!--/左側のカラム-->
	</div>
	<div class="column2-right">
		<!--右側のカラム-->

    ここにテキストここにテキスト

		<!--/右側のカラム-->
	</div>
</div>
CSS
/* カラム */
.column2-waku {
    display:flex;
    width:100%;
    border:solid 0px;
    font-size: 90%;
}
.column2-left {
    border: solid 0px;
    width: 48%;
    margin-right:2%;
}
.column2-right {
    border: solid 0px;
    width: 48%;
    margin-left:2%;
}

@media screen and (max-width: 1000px) {
    .column2-waku {
        display:block;
        width:100%;
    }
    .column2-left {
    border: solid 0px;
    width: 100%;
    margin:0;
    }
    .column2-right {
    border: solid 0px;
    width: 100%;
    margin:0;
    }
}
HTMLはノートに直接、
CSSはObsidian>Value名>.obsidian>snippets>CSS-style.cssに貼り付けることで適用されます!
論文風の見出し
上で作ったカラムのなかに見出しを作るとき用のタグです。
中央見出し
中央見出し
<div style="font-size: 1.4em; font-weight: bold;text-align: center;">中央見出し</div>左寄せ
1.1 見出し
1.2 見出し
<div style="font-size: 1.2em; font-weight: bold;">1.1 見出し</div>
<div style="font-size: 1.2em; font-weight: bold;">1.2 見出し</div>
Obsidianのノートをpdf出力するだけで簡易的な論文風の文章が作れます。
プラグインに依存していないので、変な誤作動もありません。
細かい修正も自由です。
ぜひ使ってみてください!


